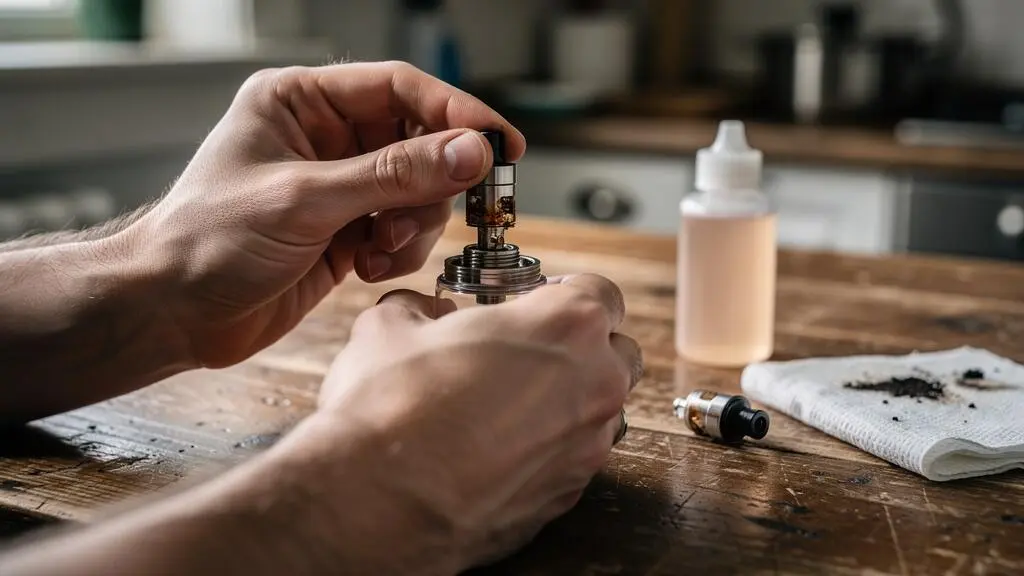
A vape coil should be replaced when its performance has deteriorated despite adequate e-liquid, suitable power settings and a properly charged device. Persistent burnt flavour, noticeably reduced vapour production and recurring dry hits are stronger reasons to change a coil than the number of days it has been installed.
Coils do not wear out at a fixed rate. Someone using a sweetened e-liquid frequently may notice deterioration much sooner than someone vaping occasionally with a less residue-forming liquid. Even two coils of the same model can behave differently depending on the operating conditions.
Replacing every coil according to an arbitrary schedule creates unnecessary expense and waste. Continuing to use a damaged wick, however, can make the experience increasingly harsh and unpleasant. The practical solution is to recognise changes in flavour, vapour and device behaviour, rule out simple maintenance problems, and replace the heating head when there is good reason to believe it has reached the end of its useful life.
When to change a vape coil: the essentials
- Replace promptly: Persistent burnt or acrid taste, repeated dry hits under correct operating conditions, or visibly charred wicking material indicate that the coil should no longer be used.
- Check before replacing: Muted flavour or weak vapour can also result from a dirty tank, low battery charge, unsuitable wattage or poor electrical connections.
- Follow performance, not the calendar: Inspect the coil during normal refilling and maintenance, then use your own experience to estimate its typical lifespan.
- Why Does a Vape Coil Gradually Lose Flavour and Vapour Output?
- How Do You Replace a Vape Coil Without Causing Leaks or a Burnt Start?
- New Coil or Tank Cleaning: Which Should You Try First for Poor Flavour?
- Which Coil Warning Signs Mean Replacement Should Not Be Delayed?
- How Often Should You Check a Vape Coil for Signs of Wear?
- Worn Coil or Weak Battery: Which Is Causing Poor Vape Performance?
- How Do You Prime a Replacement Coil Without Flooding the Tank?
- How Does an Atomizer Head Affect Everyday Vape Performance?
Why Does a Vape Coil Gradually Lose Flavour and Vapour Output?
A vape coil gradually loses performance because repeated heating can leave deposits around its heating element and wicking material, interfering with efficient liquid vaporisation. The wick itself may also deteriorate through repeated exposure to heat. Flavour and vapour production can decline together, although the symptoms are not always equally noticeable or caused by exactly the same problem.
Inside a replaceable coil head, an electrical heating element warms e-liquid delivered by a surrounding wick, commonly made from cotton. During repeated use, deposits can build up on heated surfaces. Residue may change the way heat reaches the liquid, while deterioration of the wick can interfere with consistent saturation.
These effects are related but distinct. A coil with substantial deposits may produce dull or altered flavour while still generating reasonable vapour. A coil with damaged or poorly saturated wicking material may produce harsh, dry-tasting puffs. A damaged electrical element or connection can also interrupt heating, although gradual resistance changes should not automatically be assumed to explain ordinary flavour loss.
E-liquid formulation matters. Sweeteners can undergo chemical changes during heating. For example, research published in Chemical Research in Toxicology on sucralose degradation found that sucralose increased the formation of certain solvent degradation products under experimental vaping conditions.
That finding helps explain why sweetened liquids deserve attention, but it does not establish that every sweet e-liquid shortens coil life by a particular amount. Nor does dark liquid colour, by itself, prove that a formulation will damage a coil faster. Different ingredients, operating temperatures and vaping patterns all matter.
Residue and permanent wear should not be confused. In some rebuildable atomisers, experienced users can service suitable bare heating elements separately from their wicks. Ordinary replaceable coil heads, however, are not designed for dry-burning or rebuilding. Heating a cotton-wicked disposable head without liquid risks scorching its wick rather than restoring it.
A newly installed coil may behave slightly differently while its wick becomes fully saturated and its operating conditions stabilise. Nevertheless, a new coil should not require several refills of consistently poor flavour before functioning properly. Persistent weakness from the beginning warrants checking compatibility, priming and power settings.
When flavour gradually becomes dull after a period of satisfactory use, inspect the coil and eliminate basic liquid or device problems before deciding whether replacement is justified.
How Do You Replace a Vape Coil Without Causing Leaks or a Burnt Start?
To replace a vape coil safely, switch off the device, remove the old head according to the manufacturer’s instructions, fit a compatible replacement and ensure all seals are correctly positioned. Prime the exposed wick, refill the tank and allow sufficient soaking time before firing. Begin at the lower end of the recommended power range to reduce the risk of a burnt first puff.
Coil replacement mechanisms vary. Some tanks use screw-in heads, while others use push-fit cartridges or integrated-coil pods. With a bottom-mounted coil, opening a filled tank incorrectly can release its contents. Empty or partially drain the reservoir when the design requires it, rather than assuming every coil can be changed while liquid remains inside.
- Switch off and disassemble: Remove the tank or pod as instructed and place its components on a clean, absorbent surface.
- Remove the used coil: Unscrew or pull out the old head using the intended mechanism. Inspect the surrounding area for residue, damaged threads and displaced seals.
- Check the replacement: Confirm the coil model, resistance and compatibility with the tank before installation.
- Prime and fit: Apply a small amount of e-liquid to exposed cotton ports where permitted, then insert the coil securely without forcing or cross-threading it.
- Refill and wait: Reassemble the tank, check its seals, fill it without overfilling, and allow the wick to saturate for the period recommended by the manufacturer.
- Start gently: Use the lower end of the specified wattage range for the initial fired puffs, increasing gradually if appropriate.
The Innokin KROMA-Nova user manual provides a concrete manufacturer example: it instructs users to prime the replacement coil and wait at least five minutes after filling. That interval applies to the equipment described in the manual and should not be treated as a universal requirement.
Why does a new coil sometimes taste burnt immediately? The most common explanation is that insufficiently saturated cotton has been heated. Once cotton has been scorched, simply adding more e-liquid may not restore the original flavour.
Some users take gentle draws without activating the device to encourage liquid movement through the wick. This can complement normal saturation time on suitable equipment, but excessive suction may draw surplus liquid into the airflow path. It should never replace the manufacturer’s preparation instructions.
Leaks after replacement require a different inspection. Check whether the coil is seated correctly, whether an O-ring was displaced, whether the tank was overfilled and whether the power setting suits the installed head. A damaged gasket or incorrect assembly can cause leakage even when the replacement coil is brand new.
If a fresh coil immediately leaks, gurgles or tastes burnt, stop firing and investigate the setup before installing yet another head. Repeated replacements will not correct a damaged seal or an unsuitable setting.
New Coil or Tank Cleaning: Which Should You Try First for Poor Flavour?
Try cleaning the tank first when flavour is muted but vapour production remains consistent and there is no burnt taste. Consider coil replacement when the wick is visibly damaged, dry hits continue under correct operating conditions, or both flavour and vapour have deteriorated. Cleaning and replacing are complementary maintenance actions rather than interchangeable solutions.
Old e-liquid can remain on the tank walls, inside the chimney and around the mouthpiece. When switching flavours, these residues may cause flavour ghosting: traces of the previous liquid remain noticeable even after a refill. A new coil cannot remove residue elsewhere in the reservoir.
The opposite problem occurs when the tank is clean but deposits remain inside the coil head. Washing the mouthpiece and glass will not restore a damaged wick or reliably remove baked-on deposits from a standard replaceable head.
The following comparison offers a practical starting point. These are possible explanations, not definitive diagnoses.
| Observed symptom | Likely first action | When replacement makes sense |
|---|---|---|
| Old flavour persists after switching e-liquid | Clean reusable tank parts and mouthpiece | If flavour remains trapped in the old coil |
| Muted flavour with otherwise normal vapour | Inspect liquid condition, tank cleanliness and settings | If performance remains dull after checks |
| Persistent burnt flavour | Stop firing and check liquid supply and wattage | If the wick has been scorched or the problem persists |
| Gurgling or leakage | Inspect seals, installation, filling and power | If coil damage or failed wicking is identified |
| Weak flavour and thin vapour together | Check charge, airflow and settings | If the device is functioning correctly but output stays poor |
For routine cleaning, disassemble the tank according to its instructions. Rinse washable, non-electronic parts with warm water, paying attention to the glass, chimney and mouthpiece. Inspect O-rings for damage or displacement. Let every rinsed component dry fully before reassembly.
Do not immerse electronics or battery-containing components. Ordinary replaceable coil heads should also be excluded from the rinsing procedure unless their manufacturer explicitly provides a suitable cleaning method. Avoid introducing unapproved solvents into components that will contact e-liquid.
Innokin’s published atomizer cleaning instructions recommend cleaning when changing coils or switching to substantially different e-liquids. The procedure separates the washable atomiser parts from the coil and includes drying before reassembly.
There is also a straightforward waste consideration. Cleaning a serviceable tank can avoid discarding a functional coil unnecessarily. Conversely, repeatedly attempting to revive a genuinely burnt head wastes time and may leave the underlying problem unresolved.
If the existing coil still performs normally, cleaning the reusable components may be sufficient. When a replacement is genuinely due, cleaning the tank at the same time helps the fresh head deliver an uncontaminated flavour experience.
Which Coil Warning Signs Mean Replacement Should Not Be Delayed?
Stop using a coil when it produces a persistent burnt or acrid taste, repeated dry hits despite adequate saturation, or obvious charring of the wick. These signs deserve more urgent attention than gradual flavour dullness alone. Unusual crackling, gurgling and leakage also require investigation, but they do not independently prove that the coil has failed.
A useful distinction is between symptoms that indicate potentially damaged wicking material and changes that simply justify further checks.
- Stop using the affected coil: Persistent burnt cotton flavour, visibly scorched wicking material or repeated harsh dry hits after checking liquid level and settings.
- Investigate before continuing: Metallic or electrical irregularities, abnormal heating, repeated device errors, sudden severe gurgling or unexpected leakage. Some of these symptoms may require stopping use of the entire device until the fault is identified.
- Monitor and troubleshoot: Gradual flavour dullness, modestly reduced vapour, darkening of the visible wick or minor changes in normal operating sound.
A burnt taste can result from insufficient priming, unsuitable power, an empty reservoir or excessively frequent consecutive puffs. It is therefore important to correct those conditions before concluding that long-term wear caused the problem. However, if the wick has already been scorched, returning to the correct settings may not reverse the damage.
Visual inspection can support a replacement decision. Thick black deposits, severe discoloration combined with persistent unpleasant flavour, or visibly damaged cotton are more concerning than mild darkening alone. Some e-liquids discolour wicks without causing immediate functional failure.
Heating conditions also matter. Experimental research on sucralose-containing e-liquids has identified chemical degradation products formed during aerosol generation. Such evidence supports avoiding unsuitable heating conditions, but it does not quantify the health risk of an individual worn coil or prove that every dark wick produces a particular harmful compound.
There is no basis for claiming that using an old coil necessarily causes a return to cigarette smoking or directly accelerates battery ageing. Poor performance may encourage longer or more frequent draws, but these behaviours and their consequences vary between users.
Gurgling and spit-back deserve attention because excess liquid may have entered the airflow channel. A worn or incorrectly installed coil is one possible cause, alongside overfilling, unsuitable settings and faulty seals. Replacing the head without addressing the actual cause may leave the problem unchanged.
To calibrate gradual flavour changes, compare the same familiar e-liquid with its performance when the coil was working well, ideally on the same correctly configured device. Avoid sharing mouthpieces or relying on another device as an exact technical reference, since different coils and power settings naturally produce different results.
When burnt flavour persists after correcting operating conditions, stop trying to compensate with more power or longer puffs. Replacing the damaged head is preferable to continuing with an unpleasant, unreliable setup.
How Often Should You Check a Vape Coil for Signs of Wear?
Check coil performance whenever you refill the tank and inspect its visible condition during routine cleaning or maintenance. There is no universally reliable replacement interval because coil life depends on e-liquid formulation, power, vaping frequency and device design. Recording your own typical coil lifespan is more useful than treating a fixed number of days as a replacement deadline.
A coil used occasionally at an appropriate setting may remain satisfactory for weeks, while one exposed to frequent heating and a heavily sweetened liquid may deteriorate much sooner. Neither outcome is guaranteed, and calendar age alone says little about the amount of actual use.
The simplest approach is to build inspection into activities that already occur naturally. At each refill, note whether the flavour remains recognisable, whether the vapour seems consistent and whether any dry or harsh sensation has appeared. When the coil is accessible, look for obvious deposits or damaged cotton without dismantling sealed components.
Performance matters more than colour alone. A darkened wick is worth checking, but darkening can reflect liquid composition rather than irreversible failure. Conversely, a coil that looks relatively clean can still have damaged wicking material or poor performance.
Listen for meaningful changes in operation as well. A new gurgling noise alongside weak vapour may suggest excess liquid or insufficient heating. A dry sensation combined with harsh output may indicate inadequate saturation. Sound is supporting information, not a standalone replacement test.
For a personal baseline, record the installation date, approximate liquid consumption, e-liquid type and operating wattage. When the coil is eventually replaced, note the main reason. Over several replacements, this creates a practical picture of how the equipment behaves under your normal conditions.
Five checks to record before replacing a vape coil
- Confirm the liquid supply: Check that the wick can receive e-liquid and record whether the tank was low or adequately filled.
- Check the operating settings: Compare the selected wattage with the installed coil’s stated range and note any mismatch.
- Assess flavour: Identify whether it remains normal, has become muted or tastes persistently burnt, and record the result.
- Assess vapour and visible condition: Note any reduction in output and inspect accessible wick areas for deposits or damage.
- Record the decision: Keep the installation date, approximate liquid usage and reason for cleaning, monitoring or replacing the coil.
These records do not need to be precise laboratory measurements. Their value comes from comparing similar usage conditions and recognising patterns that matter for your particular tank and liquid.
Once a typical lifespan becomes apparent, use it as a reminder to check the coil more carefully rather than an automatic instruction to discard it. Before making the final decision, consider whether a power or battery problem could explain the symptoms.
Worn Coil or Weak Battery: Which Is Causing Poor Vape Performance?
A worn coil often produces persistent flavour deterioration or weak vapour even when the device is adequately charged and correctly configured. Battery or power-delivery problems are more likely when performance improves after charging, the device shuts down unexpectedly, or firing becomes unreliable. Because several faults can produce similar symptoms, checking power, connections and coil condition separately is more dependable than judging vapour volume alone.
The first useful distinction is between the heating head and the electrical system supplying it. The coil converts electrical power into heat, but the device must provide that power reliably. If the battery cannot maintain sufficient output, a functional coil may appear to perform poorly.
On a regulated device, reduced battery charge does not necessarily mean proportionally reduced vapour. Some electronics maintain the selected output until the battery approaches its operating limit. Consequently, battery indicators and behaviour under load are more informative than simply assuming that a low charge always causes weak vapour.
The symptom patterns below provide a reasonable diagnostic order.
| Performance issue | Coil-related possibility | Battery or connection possibility |
|---|---|---|
| Muted flavour and reduced vapour | Deposits or deteriorated wicking | Insufficient delivered power or unsuitable settings |
| Vapour improves after charging | Coil condition may be unchanged | Charge-dependent power delivery |
| Delayed or inconsistent firing | Poor coil contact or electrical fault | Dirty contacts, connection problems or device fault |
| Persistent burnt taste | Scorched or insufficiently saturated wick | Incorrect operating settings may contribute |
| Repeated shutdown or error message | Possible incompatible, damaged or incorrectly installed coil | Battery, circuitry or electrical connection issue |
Start by charging the device through its recommended charging method. Check that the correct coil is installed and that the power setting matches its specified range. Inspect accessible contacts for residue and make sure removable components are seated correctly.
A dirty 510 connection can interrupt electrical contact between a removable tank and the device. Clean accessible contact surfaces only with the device switched off, using an appropriate dry method unless the manufacturer specifies otherwise. Do not open, modify or attempt to repair battery circuitry.
On a device whose output varies with charge, comparing performance when adequately charged and at a lower charge level may reveal a power-delivery limitation. This is an informal observation, not a validated test for distinguishing battery ageing from coil wear. Do not deliberately discharge a battery excessively to perform it.
It is also possible for both components to be deteriorating simultaneously. Someone compensating for poor coil performance with repeated draws may notice increased charging frequency without the battery itself being defective. Battery capacity also declines with age independently of coil condition.
The safest troubleshooting sequence is to correct simple settings and contact problems first, then assess coil condition, and finally investigate battery or device faults that remain. For removable batteries showing damage or abnormal heating, discontinue use and follow appropriate manufacturer guidance rather than continuing diagnostic vaping.
If a coil is confirmed to be worn, proper preparation of its replacement matters just as much as choosing the correct head. Poor priming can create an immediate burnt taste that resembles the problem the replacement was intended to solve.
How Do You Prime a Replacement Coil Without Flooding the Tank?
Prime a replacement coil by applying a small amount of e-liquid to its exposed wick openings, if the manufacturer permits direct priming, then install it and allow the filled tank to stand. Avoid pouring liquid into the central airflow channel. Starting at an appropriate low power and allowing sufficient saturation time helps prevent dry hits without unnecessarily flooding the head.
Priming has a specific purpose: to ensure that the cotton or other wicking material contains enough liquid before electricity heats the coil. A dry wick can scorch very quickly, leaving an unpleasant taste that may persist even after the tank is refilled.
For compatible replaceable heads, small drops placed directly on visible cotton ports can begin saturation before installation. The surrounding tank liquid then continues to move into the wick during the resting period. Some integrated-coil pods instead rely on filling and waiting, without direct access to the cotton.
More liquid is not always better. Excess e-liquid delivered into the centre of a coil can enter the airflow passage instead of being absorbed by the wick. This may cause bubbling, gurgling, liquid spit-back or leakage through the bottom of the tank.
Manufacturer guidance should determine the amount of liquid used. Innokin’s technical troubleshooting instructions, for example, describe applying approximately one drop to each cotton wick port during priming. That procedure must be adapted to the actual head design rather than applied indiscriminately to sealed cartridges.
After priming, assemble the device, fill the tank correctly and keep it upright while the wick saturates. Higher-VG e-liquids are generally more viscous, so some compatible coil-and-liquid combinations may benefit from additional waiting time. This does not mean that high-VG liquid is suitable for every coil; the tank’s intended liquid characteristics still matter.
A few gentle draws without activating the heating element may help on certain tank designs, but they should be used cautiously. Strong repeated suction can encourage excess liquid to enter the airflow channel. Waiting for saturation is more important than attempting to force liquid through the wick.
For adjustable devices, begin at the lower end of the coil’s recommended wattage range and increase only as needed. Avoid immediately taking many consecutive puffs at high power, particularly when working with a thick liquid or a newly saturated wick.
If the first puff tastes burnt, stop firing. Check the liquid level, operating range and soaking time. If the wick has already suffered permanent scorching, additional priming may not restore its original performance.
If the tank gurgles instead, inspect for overfilling or liquid in the airflow channel and follow the manufacturer’s approved procedure for removing excess liquid. Do not assume that a noisy newly installed coil requires replacement without checking these simpler explanations.
Once the head is prepared correctly, its resistance, heating design and airflow compatibility determine how it performs during everyday vaping. Those characteristics should influence which replacement is purchased in the first place.
Key takeaways before choosing a replacement
- Compatibility comes first: A coil must fit the tank and operate within the device’s supported electrical and power limits.
- Replacement should address the fault: A new head will not solve every problem caused by unsuitable settings, damaged seals or unreliable connections.
- Repeat what works: If a particular compatible coil design consistently delivers satisfactory performance, it provides a useful reference for future purchases.
How Does an Atomizer Head Affect Everyday Vape Performance?
An atomizer head contains the heating element and wicking system responsible for converting e-liquid into inhalable aerosol. Its electrical resistance, recommended power range, airflow characteristics and wick design all influence flavour, vapour production and draw sensation. Choosing a compatible head and operating it correctly is essential before deciding whether disappointing performance reflects normal limitations or coil wear.
A replaceable atomizer head typically combines a metal housing, an electrically heated element and absorbent material that delivers e-liquid to the heated surface. Some heads use mesh heating structures, while others use conventional wrapped wire. Their differing designs can influence heat distribution, liquid delivery and airflow.
Resistance and wattage must be considered together. A lower-resistance head is not automatically better, nor is a higher-resistance one necessarily more economical. Actual performance depends on the coil design, its intended operating range and the capabilities of the device supplying power.
Manufacturer specifications illustrate why apparently similar heads should not be treated as interchangeable. The Innokin KROMA-Nova documentation lists a PZP 1.0-ohm coil with a recommended range of 9–13 W and a PZP 0.4-ohm coil with a range of 30–40 W. These values describe two specific compatible products, not universal wattage rules for all coils of those resistances.
Operating substantially below a head’s recommended range may deliver inadequate heat for consistent vaporisation. Depending on the design and liquid, this can contribute to weak flavour, reduced vapour or excess liquid accumulation. Operating above the recommended range can overwhelm liquid delivery and cause harsh or dry puffs.
Airflow is equally important. A coil intended for a restricted draw may perform differently from one designed for a more open airflow path. Changing the head without considering the associated airflow can alter vapour temperature and draw resistance even when the same e-liquid is used.
Wicking materials and liquid viscosity also interact. A design that works satisfactorily with a relatively thin liquid may struggle with a much more viscous formulation, particularly during frequent puffs. Choosing a head suitable for the intended e-liquid is more reliable than trying to correct every problem by increasing power.
These design differences explain why replacing a worn coil with an unfamiliar alternative can make troubleshooting difficult. A change in flavour after installing a different mesh structure, resistance or airflow design does not necessarily mean that the replacement is defective.
For consistent results, identify the exact tank or pod model, check the manufacturer’s compatible heads and select the type that previously delivered satisfactory performance. Confirm the recommended operating range before fitting it. The lowest purchase price alone is not a sufficient measure of suitability.
The atomizer head is a consumable, but the surrounding device is not automatically at fault when it wears out. A confirmed decline in performance caused by deposits or damaged wicking generally calls for replacement of the head. A power mismatch, loose connection or contaminated tank instead calls for correcting that specific problem.
Before the next refill, check whether the installed head is compatible, correctly powered and still delivering the expected flavour without dry or burnt sensations. If those basic conditions are satisfied but performance continues to deteriorate, replace the head with a suitable equivalent and prime it according to its manufacturer’s instructions.
Can a vape coil still work after the cotton has turned brown?
Yes. Brown or darkened cotton can reflect e-liquid staining and deposits without proving that the coil has stopped working. Consider flavour, vapour consistency and the presence of burnt or dry hits alongside the visible condition. Thick charring combined with persistent burnt flavour is a stronger reason for replacement than colour alone.
Should you replace a coil every time you change e-liquid flavour?
Not necessarily. If the coil is in good condition, cleaning the reusable tank parts and refilling may be sufficient. However, some flavour can remain in the coil’s wick and gradually mix with the new liquid. A fresh head may be preferable when a clean flavour change is important or the old coil is already deteriorating.
Can you extend coil life by reducing the wattage?
Using a suitable setting within the manufacturer’s recommended range can help avoid unnecessary overheating. Reducing wattage below the intended range is not automatically beneficial, as inadequate heating can contribute to poor vaporisation or liquid accumulation. Lower power will not repair an already scorched wick or remove substantial deposits.
Does a new coil need to break in before it tastes normal?
A freshly installed coil needs adequate saturation before its first fired puff, and its initial performance may differ slightly while operating conditions stabilise. However, consistently poor or burnt flavour over several refills should not be considered a normal break-in requirement. Check the priming method, compatible e-liquid, power range and installation instead.
What should you do with a used replaceable vape coil?
Allow the head to cool, remove it safely and follow the applicable local waste guidance for its mixed metal and wicking materials. Do not assume that a replaceable coil belongs in ordinary household recycling. Battery-containing disposable or integrated devices require separate consideration under the relevant electrical waste arrangements. In the UK, check local council guidance or an appropriate retailer collection scheme for the specific item.