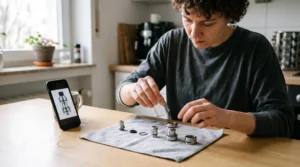
To clean a vape tank without damaging its parts, switch off the device, detach the tank, remove the coil and separate the components that the manufacturer permits you to dismantle. Rinse compatible parts with lukewarm water, use a little mild washing-up liquid only when necessary, rinse thoroughly and allow everything to dry completely before reassembly.
The important distinction is between the washable tank components and the parts that must stay dry. A glass reservoir, removable mouthpiece and compatible metal fittings can usually be cleaned separately. A replaceable coil contains absorbent wicking material, while the battery and electronic connections require different care.
Cleaning also provides an opportunity to check the O-rings, threading and condition of the coil. These small details matter because a tank can look clean yet still produce a lingering flavour, leak after refilling or perform poorly because a seal has moved.
The procedure below applies to typical refillable vape tanks used by adults. Always follow the instructions for your particular model, especially if it uses an integrated coil, unusual seals or components that are not intended to be removed.
Vape tank cleaning: the essentials
- Remove the coil and keep electronic components dry. Clean only the detachable parts confirmed as water-compatible.
- Use lukewarm water for routine residue. For stubborn deposits, mild washing-up liquid may help, provided every trace is rinsed away.
- Dry the tank completely, inspect its O-rings and replace a burnt or worn-out coil rather than expecting cleaning to restore it.
- Why Does a Vape Tank Need Regular Cleaning Even if It Is Not Leaking?
- How Do You Clean a Vape Tank Step by Step Without Losing Small Parts?
- Quick Rinse or Deep Clean: Which Does Your Vape Tank Actually Need?
- Which Vape Tank Cleaning Mistakes Can Damage Seals or Affect Flavour?
- When Should You Clean a Vape Tank Before Refilling It?
- Top Up or Empty First: Which Is Better Before Changing E-Liquid Flavour?
- How Do You Remove Flavor Ghosting Before Switching to a Very Different E-Liquid?
- When Should You Replace a Vape Coil Instead of Continuing to Use It?
Why Does a Vape Tank Need Regular Cleaning Even if It Is Not Leaking?
A vape tank needs regular cleaning because e-liquid residue can accumulate on its internal surfaces, mouthpiece and threads long before a leak becomes visible. Deposits may affect flavour, interfere with the fit of removable components and make routine maintenance more difficult. A leak-free tank is not necessarily a clean tank.
As e-liquid is repeatedly heated and replenished, residue can collect around the chimney, base and other surfaces exposed to liquid or vapour. Sweet or strongly flavoured formulations may leave particularly noticeable deposits, although the amount depends on the liquid, device and usage.
Some deposits become sticky as the liquid thickens or dries. Around a sealing surface, this can interfere with a clean fit between the O-ring and the adjacent component. It does not mean every sugary liquid will crack a seal, but accumulated residue is a sensible reason to inspect and clean the area.
Hygiene and performance are separate reasons to clean. The drip tip regularly contacts the mouth and may also collect dust, skin oils and condensation. Cleaning it addresses visible contamination and ordinary hygiene. Cleaning the reservoir, air passages and threads addresses residue that could affect the device’s operation.
The distinction matters because the mouthpiece may need attention even when the reservoir looks clear. Conversely, an apparently spotless mouthpiece tells you little about deposits near the coil or base.
Residue near e-liquid feed openings can also make it harder to diagnose a wicking problem. A dry hit may involve a worn coil, unsuitable operating conditions or an interruption in liquid supply. Inspecting accessible tank components helps identify possible obstructions, although cleaning cannot repair damaged coil cotton.
Regular inspection is therefore more useful than waiting for the first obvious leak. It also creates an opportunity to notice a missing gasket, damaged glass or displaced seal before the next refill.
Once residue and sealing surfaces are understood, the next priority is dismantling the tank in a way that protects its smallest components.
How Do You Clean a Vape Tank Step by Step Without Losing Small Parts?
Clean a vape tank by switching off the device, removing the tank, taking out the replaceable coil and dismantling only the components approved by the manufacturer. Keep the parts in order, rinse compatible pieces with lukewarm water, dry them completely and reassemble without forcing threads or seals. Organising the components is as important as washing them.
Start on a clear, flat surface covered with a clean, light-coloured towel. A pale surface makes small black O-rings easier to spot, while the towel prevents loose parts from rolling away. Taking a photograph of the assembled tank can provide a useful reference if several rings or fittings look similar.
The Innokin technical instructions for the T18 II tank describe dismantling the reservoir, separating its glass section and protecting the O-rings during cleaning. The exact dismantling sequence is model-specific, so these instructions should not be applied blindly to every tank.
A practical sequence for a compatible refillable tank is:
- Switch off the device and detach the tank from the battery or mod.
- Empty the remaining e-liquid safely and keep it away from children and pets.
- Remove the replaceable coil and put it aside on a dry cloth. Do not rinse its absorbent wick.
- Separate the glass section, base, drip tip and other manufacturer-approved removable parts.
- Rinse water-compatible components under a gentle stream of lukewarm water, paying attention to accessible threads and corners.
- Inspect and gently clean accessible sealing surfaces without stretching or scraping the O-rings.
- Leave washed components to air-dry completely, including internal channels and airflow openings.
- Reassemble in the correct order, checking each seal and starting threaded connections carefully by hand.
Never immerse the battery, mod or electronic connector. The UK Brunel Health Group guidance on cleaning vaping devices specifically distinguishes washable tank parts from coils and electronic components, which should not be rinsed.
During reassembly, an O-ring should sit flat in its intended groove. A seal that protrudes, twists or becomes trapped between two pieces can compromise the fit. Similarly, a threaded connection that does not turn smoothly may be cross-threaded; forcing it risks damaging the metal or preventing a proper seal.
Do not overtighten the tank onto the device. Excessive pressure may stress the connector or make later removal difficult. A tank that does not register correctly after reassembly needs further inspection rather than additional force.
Five checks before refilling your cleaned tank
- Account for every component: compare the dismantled parts with your original photograph and confirm that no O-ring or fitting is missing.
- Check cleaning results: inspect the glass, base and drip tip for visible residue, leaving no obvious deposits on washable surfaces.
- Verify dryness: examine the chimney, base and airflow openings and confirm that no visible water remains.
- Inspect the seals: confirm that every accessible O-ring is undamaged and seated correctly in its groove.
- Test the assembled fit: check that connections turn smoothly, the tank sits correctly and there are no visible gaps before adding e-liquid.
A careful procedure prevents avoidable handling damage. The amount of cleaning required, however, depends on the residue you find rather than on a fixed rule for every refill.
Quick Rinse or Deep Clean: Which Does Your Vape Tank Actually Need?
A quick lukewarm-water rinse is usually sufficient when the tank has light residue and no persistent unwanted flavour. A deeper clean is more appropriate when deposits remain sticky, an old flavour persists or the tank has been stored for some time. The condition of the components should determine the cleaning method.
For routine maintenance, remove the coil and rinse the compatible tank parts. This is generally the least complicated approach when the remaining film is easy to remove and the next liquid has a similar flavour profile.
The Vaporesso guide to cleaning vape tanks describes a lukewarm rinse for ordinary maintenance and the use of a small amount of mild washing-up liquid for stubborn deposits on compatible glass and metal parts.
Its guidance also suggests periodic deeper cleaning, including an interval of one to two weeks for a tank used with the same flavour. That is a manufacturer’s general recommendation, not a scientifically established interval suitable for every device or e-liquid.
Use the following comparison to choose the less aggressive method that can achieve the result.
| Decision factor | Quick rinse | Deep clean |
|---|---|---|
| Typical condition | Light film or routine maintenance | Sticky buildup or persistent residue |
| Flavour change | Similar flavour profiles | Strongly contrasting flavours |
| Cleaning agent | Lukewarm water | Lukewarm water and, if appropriate, a little mild washing-up liquid |
| Disassembly | Remove the coil and separate necessary components | Separate all manufacturer-approved removable parts |
| Final inspection | No obvious remaining film | No visible sticky deposits or cleaning-product residue |
Very sweet dessert-style liquids can produce noticeable deposits, but flavour category alone cannot predict how quickly a particular tank will become dirty. Heating conditions, formulation and usage all matter. A clear-looking liquid is not a guarantee that it leaves no residue.
For a deeper clean, use only cleaning agents compatible with the particular materials. Mild washing-up liquid diluted in lukewarm water is a reasonable option for suitable glass and metal pieces. Thoroughly rinse every washed surface afterwards, as remaining detergent can affect the next e-liquid’s flavour.
Some informal cleaning methods involve vinegar, bicarbonate of soda or alcohol. These should not be treated as universally safe alternatives. Their compatibility with coatings, adhesives, plastics and seals is not established by the supplied manufacturer guidance. Avoid them unless your device manufacturer explicitly approves the method.
After cleaning, inspect the reservoir for visible film, check for a lingering smell when dry and look for residue in accessible threads. These are practical checks, not guarantees that every contaminant or absorbed flavour has been removed.
Once the mildest effective method has been selected, protecting the seals and tank materials becomes the next concern.
Which Vape Tank Cleaning Mistakes Can Damage Seals or Affect Flavour?
The most damaging vape tank cleaning mistakes are using excessively hot water, applying harsh chemicals, scraping plastic surfaces, losing O-rings and reassembling parts before they are dry. Another common problem is failing to rinse away all the soap. These errors can affect the tank’s fit, leave unwanted flavours or damage sensitive materials.
Seals deserve particular attention because they are small, easily misplaced and essential to the fit of many refillable tanks. They should not be stretched unnecessarily, rubbed with abrasive tools or compressed beyond the manufacturer’s instructions.
Hot water is not automatically better cleaning. Manufacturers caution against high temperatures because materials and seals differ in their heat tolerance. Lukewarm water is a more conservative choice for routine maintenance.
Plastic reservoirs also require care. Abrasive pads can scratch their surfaces, while aggressive solvents may be incompatible with certain plastics or finishes. The appropriate cleaning method depends on the actual material, whether it is glass, polycarbonate, another polymer or a coated component.
Common mistakes and their possible consequences include:
- Using boiling water: exposes plastic fittings and seals to unnecessary heat and potential damage.
- Scrubbing with an abrasive sponge: risks scratching plastic or damaging softer sealing surfaces.
- Washing tiny parts over an open plughole: makes O-rings and gaskets easy to lose.
- Reassembling a twisted seal: can leave a gap or prevent the tank from seating correctly.
- Leaving detergent behind: introduces unwanted flavour and cleaning-product residue into the refilled reservoir.
- Immersing electronic components: creates an avoidable risk of electrical damage or malfunction.
It is also easy to focus on the transparent reservoir and forget the mouthpiece, threads and base. These areas can retain residue even when the glass looks spotless.
Use a soft cloth and gentle washing rather than sharp tools to remove stubborn deposits. If a component has cracked, become distorted or no longer seals correctly, cleaning is not an adequate repair. Replace the affected part with a compatible component.
A final rinse should remove all visible soap and leave no obvious detergent residue. Allowing the tank to dry completely then helps prevent retained water from mixing with the next fill.
Protecting the parts during cleaning is only half the task. Knowing when to clean prevents unnecessary dismantling while avoiding the accumulation of residue.
When Should You Clean a Vape Tank Before Refilling It?
Clean a vape tank before refilling when you notice visible residue, an unwanted flavour, contamination around the mouthpiece or signs that the tank needs inspection. Cleaning is also sensible after extended storage, when changing to a very different e-liquid or while replacing a worn coil. You do not need to dismantle the tank before every ordinary top-up.
The most convenient moment for cleaning is often when the reservoir is nearly empty. There is less remaining liquid to deal with, and the tank can be separated without unnecessarily wasting a full refill.
Rather than relying exclusively on a calendar, watch for these practical triggers:
- A sweet or strongly flavoured liquid has left a visible film.
- The next refill will use a substantially different flavour.
- The mouthpiece, threads or accessible airflow openings need attention.
- The tank has been stored unused and may contain dust or dried residue.
- A coil replacement provides an opportunity to inspect and clean the empty reservoir.
A tank that has been stored dry for several days does not automatically need a complete deep clean. Inspect it first. If dust or dried residue is present, wash compatible parts and check that the O-rings remain correctly seated, flexible and free from visible damage.
For longer storage, examine any exposed components before reuse. Do not assume a damaged or hardened seal can be restored by washing it. A replacement gasket may be necessary.
Remember that cleaning the tank does not clean the coil. Even when the reservoir is completely rinsed, its existing wick may retain the previous liquid. Whether to replace that coil depends on its condition and how important a clean flavour transition is.
The decision is different for an ordinary refill with the same liquid. If the tank is clean, the coil performs normally and no contamination is visible, topping up may be sufficient. Repeated full dismantling brings its own handling risks, particularly for small seals and delicate threads.
When the next bottle contains a different flavour, the remaining liquid introduces another choice: whether to top up or empty the tank first.
Top Up or Empty First: Which Is Better Before Changing E-Liquid Flavour?
Top up the tank if the old and new e-liquids have similar flavours and you are comfortable with a temporary mixture. Empty and clean it first if you want the new flavour to taste distinct, especially when moving between strongly contrasting profiles. The coil’s condition matters because its wick retains the previous liquid even after the tank is emptied.
Adding a new liquid over the remainder of the old one is convenient. It also avoids dismantling the tank and preserves an already saturated coil. However, the two liquids will mix in the reservoir, and the old flavour may remain noticeable as the liquid in the wick is gradually replaced.
Emptying the reservoir creates a clearer transition. Cleaning the tank can remove liquid remaining on its surfaces, but it does not extract the old flavour already absorbed into the coil.
Consider the difference between switching from one berry flavour to another and changing from a rich dessert liquid to a light fruit flavour. In the first situation, some blending may be acceptable. In the second, the existing flavour can noticeably alter the result.
| Factor | Top up | Empty first |
|---|---|---|
| Convenience | Less dismantling and preparation | Requires emptying and potentially cleaning |
| Flavour transition | Old and new liquids mix | Less residual liquid in the tank |
| Existing coil | Remains saturated with its previous liquid | Still retains old liquid unless replaced |
| Liquid waste | Usually minimal | May require discarding the remainder |
| Best suited to | Compatible, similar flavour profiles | Distinct flavour changes or residue removal |
If the old coil is approaching the end of its useful life, a flavour change can be a convenient time to fit a compatible replacement. Follow the manufacturer’s priming instructions before using a new coil.
Do not return used liquid from the tank to its original bottle. Once dispensed, it may contain residue or have been exposed to contamination, and returning it risks affecting the remaining bottled liquid. If the unused remainder must be discarded, handle it responsibly and keep nicotine-containing liquid away from children and pets.
Flavour compatibility is ultimately a matter of preference rather than a technical guarantee. Mixing two liquids may change taste, but neither a compatible pairing nor a fully emptied tank guarantees complete removal of the previous flavour.
For stronger flavour changes, the remaining taste may come from materials other than the liquid left in the reservoir.
How Do You Remove Flavor Ghosting Before Switching to a Very Different E-Liquid?
Remove flavour ghosting by emptying the vape tank, cleaning its compatible removable parts and checking whether the old coil is retaining the previous flavour. If the new e-liquid is very different, replacing the coil is often more effective than repeatedly rinsing the reservoir. Some mouthpieces and seals may also retain odours, depending on their materials.
Flavour ghosting describes the lingering taste of an earlier e-liquid after a different one has been added. It can happen because liquid remains in the wick, on internal surfaces or around fittings that have not been cleaned thoroughly.
The wick is particularly important. It is designed to absorb and hold e-liquid, so emptying the tank does not remove all the liquid already inside the coil. This is why a freshly cleaned reservoir can still produce a noticeable trace of an earlier flavour.
A gradual approach is usually preferable to aggressive cleaning:
- Empty the tank and remove the replaceable coil.
- Rinse the glass and other manufacturer-approved washable parts with lukewarm water.
- Use a little mild washing-up liquid on compatible components if residue remains, then rinse thoroughly.
- Allow every washed part to dry completely and inspect the mouthpiece and seals.
- Consider installing a new coil when the flavour difference is substantial or the existing coil is worn.
Glass reservoirs are generally straightforward to rinse, whereas certain plastic or resin components may retain odours or flavours differently. Material-specific behaviour varies, so a long soak or stronger cleaning product should not be used without confirming compatibility.
If an accessible mouthpiece continues to retain an unpleasant flavour after appropriate cleaning, replacing that individual part may be more sensible than repeatedly washing it. The same applies to damaged sealing components, although replacement O-rings must match the original specifications.
When retaining a serviceable coil, expect some transitional flavour as the new e-liquid replaces the old liquid in the wick. How long this lasts cannot be predicted reliably from a fixed number of puffs or refills.
If the unwanted taste remains after successive refills, assess the coil and other possible causes rather than assuming the glass is dirty. A persistent burnt taste, in particular, suggests that cleaning the tank is unlikely to solve the problem.
When a clean reservoir still produces stale or burnt flavour, deciding whether the coil needs replacing is more productive than washing the same tank again.
Key takeaways before replacing a coil
- Inspect both the reservoir and coil: a clean tank cannot compensate for degraded wicking material.
- Separate persistent old flavour from a genuinely burnt taste, which points more strongly towards coil replacement.
- Use the cleaning opportunity to check seals, threads and compatibility before installing a new coil.
When Should You Replace a Vape Coil Instead of Continuing to Use It?
Replace a vape coil when it produces a persistent burnt taste, noticeably weaker flavour or consistently poor performance despite appropriate liquid levels and correct device settings. Cleaning the tank cannot restore burnt cotton or a worn-out disposable coil. Assess symptoms and manufacturer guidance rather than assuming every coil must be changed after a fixed number of days.
A vape coil combines a heating element with wicking material that delivers e-liquid to the heated surface. Over time, deposits and wear can affect performance. Residue on the heating assembly may interfere with flavour, while damaged or burnt cotton cannot be returned to its original condition by cleaning the surrounding tank.
Common warning signs include:
- A burnt taste that persists after confirming the tank contains sufficient e-liquid.
- Flavour that remains unusually muted despite a clean reservoir and suitable settings.
- A marked reduction in vapour production when other operating conditions have not changed.
- Visible deposits on accessible parts of the coil, alongside deteriorating performance.
- An unexplained change in draw or airflow that remains after checking for accessible obstructions.
None of these signs alone identifies every possible problem. A low liquid level, unsuitable power setting, blocked airflow or poor connection can produce overlapping symptoms. Check the manufacturer’s troubleshooting guidance before attributing every change to the coil.
A burnt wick is different from a dirty tank. Deposits on washable tank surfaces can be removed, but the absorbent material in a disposable coil is not normally designed for repeated washing. The UK institutional guidance included earlier advises against rinsing coils, and Vaporesso distinguishes replaceable burnt coils from washable tank components.
Some rebuildable systems permit maintenance of specific heating elements, but these require their own equipment and manufacturer-specific procedures. They should not be confused with the sealed, replaceable coil heads commonly used in everyday refillable tanks.
Replacing the coil while the tank is empty allows the reservoir and accessible fittings to be inspected at the same time. This is particularly useful after persistent flavour ghosting or visible residue buildup, but it does not mean every cleaning session requires a new coil.
Fit only a coil compatible with the specific tank and follow the manufacturer’s instructions for priming and operating power. A new coil that has not been adequately saturated before use can suffer damage, making correct installation an essential part of maintenance.
At your next refill, inspect the tank, remove any accessible residue and assess the coil separately. Clean compatible components when needed, replace a coil that is genuinely worn or burnt, and check that the assembled tank is dry and properly sealed before returning it to use.
Can you clean a vape tank without removing the coil?
Cleaning the reservoir thoroughly is more difficult when the coil remains installed. For tanks with removable coil heads, the safer approach is to remove the coil and wash only the compatible components. If your tank has an integrated coil, follow its specific cleaning instructions rather than attempting to dismantle a sealed assembly.
Is it safe to soak a vape tank overnight?
Extended soaking is usually unnecessary for ordinary residue. It may also expose seals, coatings or adhesives to cleaning agents longer than intended. Prefer a short, gentle clean using the manufacturer’s approved method, followed by thorough rinsing and complete drying.
Can you put vape tank parts in a dishwasher?
A dishwasher is not a suitable default cleaning method. Heat, detergent and mechanical movement may be incompatible with plastic parts, seals and delicate fittings. Hand-washing approved components with lukewarm water gives better control over the cleaning process.
What should you do if a vape tank leaks after cleaning?
Stop using the leaking tank and inspect the O-rings, glass section and threaded connections. Check whether a gasket is missing, twisted or damaged, and confirm that the components have been assembled in the correct order. Replace damaged parts with compatible replacements. If the leak persists, consult the manufacturer rather than tightening the parts excessively.
Can cleaning remove a burnt taste from a vape?
Cleaning may remove unwanted residue from the tank, but it cannot repair burnt coil cotton. If the burnt taste persists after checking the liquid level and appropriate settings, replace the coil according to the manufacturer’s instructions. Do not attempt to restore a burnt disposable coil by rinsing or soaking it.