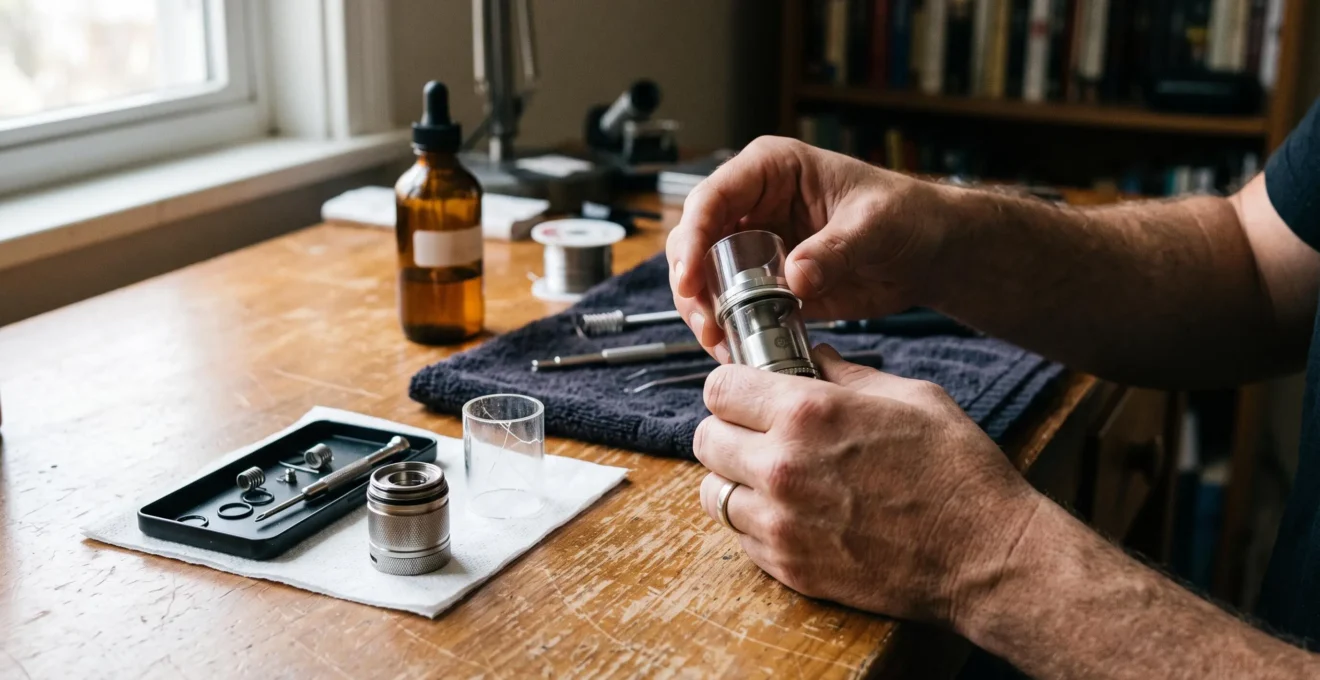
A cracked vape tank glass should be replaced before the device is used again, even when the reservoir still appears to hold e-liquid. A damaged glass tube can compromise the seal, leave sharp fragments around the tank base and make an otherwise simple repair more difficult. The safest approach is to identify the exact replacement part, dismantle the tank carefully and inspect every seal before reassembly.
Most replaceable glass tanks use O-rings to form a liquid-tight connection between the glass and surrounding metal components. A replacement tube that fits poorly, or a seal that becomes twisted during installation, can allow liquid to escape through the base or along the glass edge.
The repair is manageable on tanks designed for user replacement, but the manufacturer’s instructions take priority. Some devices use integrated reservoirs that should not be dismantled. If the metal housing, threading or electrical components are damaged, replacing the glass alone may not restore safe operation.
Replacing cracked vape tank glass: the essentials
- Stop using the damaged tank, remove it from the powered device and confirm that replacement glass is compatible with the exact model.
- Inspect the O-rings, clean away fragments and fit the replacement without forcing or distorting the seals.
- Reassemble according to the manufacturer’s instructions, then check for leaks before reconnecting the tank to the device.
- Why Replace Cracked Vape Tank Glass Even If It Still Holds Liquid?
- How Do You Change Vape Tank Glass Without Pinching the O-Rings?
- Straight or Bubble Vape Glass: Which Better Fits Your Daily Use?
- Which Mistakes Make Broken Vape Glass More Difficult or Unsafe to Replace?
- When Should You Replace Tank O-Rings During a Glass Change?
- Replacement Glass or New Tank: Which Is More Sensible After Damage?
- How Do You Clean a Vape Tank Step by Step Without Losing Small Parts?
- When Should You Replace a Vape Coil Instead of Continuing to Use It?
Why Replace Cracked Vape Tank Glass Even If It Still Holds Liquid?
A cracked vape tank glass needs replacing because retaining liquid does not demonstrate structural integrity. A hairline fracture may remain temporarily leak-free while leaving the reservoir vulnerable to further damage during handling or assembly. Continuing to use it risks unexpected leakage, broken glass and exposure to sharp fragments.
Tank glass is held between components that place pressure on its sealing surfaces. Normal handling, accidental knocks and changes in temperature can place additional stress on an already weakened tube. The precise likelihood of a crack spreading cannot be determined from its appearance alone, so waiting for a visible leak is not a reliable decision rule.
A fine fracture may also create a narrow path where e-liquid collects. Residue around the glass edge or metal housing makes it harder to assess the condition of nearby seals. Although contamination concerns justify careful cleaning, there is insufficient evidence here to claim that bacteria necessarily grow inside every crack or that cracked glass directly changes e-liquid flavour.
The position of the damage helps identify what requires inspection:
- Chip at the rim: particularly concerning because the damaged edge contacts the O-ring. Inspect the seal and seating surface; replace the glass before reuse.
- Vertical hairline crack: stop using the tank and replace the tube, even when no liquid is escaping.
- Crack extending towards the base: do not operate the tank. Check the metal housing and associated components for additional damage.
These are practical inspection categories, not scientifically validated grades of crack severity. Any confirmed crack is sufficient reason to stop using the damaged glass.
A temporary wrap made from tape or heat-shrink material is not an appropriate repair. It does not restore the glass’s original strength or sealing geometry and can conceal further deterioration. The Greater Manchester Fire and Rescue Service vaping safety advice recommends stopping use when a vaping device appears damaged and following manufacturer instructions rather than modifying the equipment.
Once the reservoir is identified as damaged, the next challenge is removing it without harming the seals that will hold the replacement in place.
How Do You Change Vape Tank Glass Without Pinching the O-Rings?
To change vape tank glass without pinching the O-rings, empty the reservoir, dismantle it in the manufacturer’s specified order and inspect the sealing grooves before fitting the new tube. Keep each O-ring in its correct position and never force glass over a displaced seal. Reassemble with even pressure and verify alignment before tightening.
First, switch off the device and detach the tank where its design allows. Remove the remaining e-liquid into a suitable, clearly identified container only if it can be handled without contamination. Liquid exposed to glass fragments should not be reused. Follow the tank manual to remove the base and any components required to release the glass.
For a typical replaceable-glass construction, the maintenance sequence is:
- Empty the tank and place it on a clean towel or shallow tray.
- Unscrew the designated tank section while avoiding pressure directly on cracked glass.
- Carefully remove the damaged tube and collect any loose fragments.
- Inspect the upper and lower O-rings, noting which groove each occupies.
- Clean the seating surfaces and install the correct replacement seals where necessary.
- Position the compatible glass tube centrally and reassemble the tank without overtightening.
The main difficulty is that an O-ring can shift out of its groove as the glass is fitted. A twisted, partially displaced or incorrectly sized ring may appear acceptable from outside but fail to form a continuous seal.
If the manufacturer permits it, a very light film of compatible e-liquid on an undamaged seal may reduce friction during installation. Do not assume silicone lubricant, twisting motions or a loose-base dry fit are appropriate for every tank. The correct method depends on seal material and the tank’s construction.
Before final tightening, inspect the glass from several angles. It should be centred, with both ends seated evenly and no rubber protruding from the joint. If resistance seems abnormal, stop and check the seal placement rather than tightening harder.
Avoid inserting a screwdriver or other metal implement between the seal and glass. A plastic tool approved for the task, or gentle fingertip pressure where safe, reduces the risk of scratching the seating surface or cutting an O-ring.
The manufacturer’s Innokin T18 II tank maintenance instructions specifically address glass replacement, O-ring placement and the risks of deforming seals through excessive force. Those instructions apply to the Innokin T18 II tank named model, not automatically to every tank.
Five checks before completing the glass replacement
- Confirm the tank model: identify the exact model and approved replacement glass before opening the tank.
- Organise the components: arrange removed parts in order on a clean tray, keeping each seal identifiable.
- Inspect the sealing surfaces: confirm that the glass seats, grooves and O-rings are clean and free from damage.
- Verify alignment: check that the new glass is centred and no O-ring is visibly twisted or pinched.
- Check the assembled tank: confirm that the joints are correctly fitted and no liquid escapes during a stationary leak check.
With the seals correctly seated, compatibility becomes the next consideration, particularly when choosing between straight and bubble replacement glass.
Straight or Bubble Vape Glass: Which Better Fits Your Daily Use?
Straight vape glass is generally the more compact choice, while bubble glass offers greater liquid capacity when a compatible version exists for the tank. The appropriate option depends on the manufacturer’s approved dimensions, the device’s overall width and everyday carrying preferences. Neither design should be treated as universally more durable or leak-resistant.
Straight glass maintains a cylindrical profile, usually keeping the reservoir close to the diameter of the surrounding metal sections. This makes it easier to accommodate protective cases or compact carrying arrangements.
Bubble glass expands outwards between its upper and lower seating surfaces. On designs that support both options, this additional space can increase usable e-liquid capacity without changing the tank’s basic connections.
The distinction is practical rather than purely aesthetic:
| Consideration | Straight glass | Bubble glass |
|---|---|---|
| Liquid capacity | Typically lower for the same tank family | Potentially higher when officially supported |
| External diameter | More compact | Wider through the curved section |
| Carrying convenience | Usually easier to accommodate in compact storage | May protrude beyond the metal tank housing |
| Exposure to knocks | Less outward protrusion | More exposed curved surface |
| Compatibility | Requires an exact approved fit | Requires an approved bubble version for that model |
Someone who refills frequently may value the larger reservoir, whereas a person carrying a device in a small protective case may prefer straight glass. For either choice, the shape alone does not establish how well the finished tank will withstand an impact.
Compatibility comes before capacity. Two glass tubes can look similar while differing slightly in height, seating diameter or wall profile. Those differences may prevent uniform compression of the O-rings.
Use the manufacturer’s model-specific replacement listing rather than selecting glass by visual resemblance. UK users should also check that the replacement configuration complies with applicable product requirements. A larger-capacity accessory should not be assumed to be permissible merely because it can be fitted physically.
If the bubble version is unavailable, a compatible straight replacement can preserve the existing tank without requiring a completely new device.
The correct format avoids one source of trouble, but careful handling remains essential when the original tube is already broken.
Which Mistakes Make Broken Vape Glass More Difficult or Unsafe to Replace?
The most serious mistakes during broken vape glass replacement are gripping fractured glass, forcing stuck components, allowing fragments into the coil chamber and fitting new glass before cleaning the seals. Each can turn a straightforward replacement into a risk of injury, persistent leakage or damage to other tank components.
A tank that still contains liquid should not be dismantled carelessly. E-liquid can spread across the work surface when the base separates, carrying small glass fragments into areas that are difficult to inspect.
Start with a stable workspace. Switch off the device, detach the tank if permitted and position it above a shallow tray lined with an absorbent towel. Keep children and pets away from the work area, especially when handling nicotine-containing liquid.
Several tempting shortcuts create avoidable problems:
- Gripping cracked glass through a cloth: fabric does not reliably protect against sharp edges. Handle intact metal components where possible and use suitable protective gloves when fragments are present.
- Forcing a stuck assembly: excessive torque can fracture remaining glass or damage the threads.
- Applying heat to loosen components: uncontrolled heating introduces unnecessary thermal and handling risks.
- Using a screwdriver to prise off glass: this can damage the seal groove and surrounding components.
- Ignoring small splinters: fragments left beneath a new O-ring may prevent an even seal.
If threaded metal sections are stuck together, first confirm the correct direction and order of disassembly in the manufacturer’s instructions. Where safe, improve grip on the metal section with a suitable non-slip material, without squeezing the cracked glass. Stop if the required force seems excessive; a professional retailer or technician may be better equipped to assess the assembly.
After removal, examine the base, airflow passages and coil area for visible fragments. Do not reuse liquid that may contain glass, and do not continue with an assembly that cannot be thoroughly cleaned.
Collect broken glass carefully, wrap it in puncture-resistant material and dispose of it according to local waste guidance. Keep detached glass waste separate from any complete device or battery requiring specialist electrical-waste handling.
Finally, inspect the metal seating surfaces for distortion or damage. Replacement glass cannot compensate for a bent housing or damaged sealing groove.
Once fragments and residue have been removed, attention should shift to the condition of the O-rings, which determine whether the replacement can seal properly.
When Should You Replace Tank O-Rings During a Glass Change?
Replace vape tank O-rings during a glass change whenever they are cut, flattened, hardened, stretched or unable to remain seated correctly. Undamaged seals can sometimes be reused when the manufacturer permits it, but their condition matters more than their apparent age. Any ring affected by broken glass or difficult removal deserves particularly close inspection.
O-rings seal the narrow junction between the reservoir and its metal housing. Their effectiveness depends on the correct material, diameter, cross-section and positioning within the groove.
When an old seal becomes compressed or damaged, it may no longer maintain consistent contact around the glass. A leak can then appear despite the new glass being completely intact.
Inspect each ring under good lighting. Look for flattened areas, visible cuts, uneven thickness, cracks or material that no longer returns to its original shape. Replace questionable seals with parts specified for the exact tank model.
Repeated exposure to heat and inappropriate cleaning agents may contribute to seal deterioration, but the effect depends on the elastomer and cleaning conditions. Avoid alcohol, aggressive detergents or ultrasonic cleaning unless the tank manufacturer explicitly permits them for the relevant parts.
A leak following glass replacement should prompt a systematic check rather than an immediate assumption that the new tube is defective. The manufacturer’s Innokin tank and coil troubleshooting instructions recommend examining glass, O-rings, seals, coil alignment and threaded connections when investigating leakage.
For a cautious initial check, fill the reassembled tank only as permitted by the manufacturer and keep it detached from the powered device. Set it upright on clean, dry tissue for several minutes, then inspect the base and joint lines for moisture. This is a practical screening method, not a manufacturer-validated proof of leak-free operation.
If the tissue becomes damp, empty the tank safely and investigate the glass seating, seals and coil installation before attempting further use. If the exterior remains dry, the result is reassuring but does not guarantee that a leak cannot develop later.
Never compensate for a poorly seated O-ring by overtightening the tank. Additional pressure can distort the seal or damage other components without resolving the underlying problem.
If the glass, seals and connections are all suspect, comparing the cost and reliability of further repair with a complete tank replacement becomes worthwhile.
Replacement Glass or New Tank: Which Is More Sensible After Damage?
Replacement glass is generally the sensible choice when the tank’s metal components are undamaged, the seals are serviceable and an exact compatible tube is available. A new tank becomes more appropriate when threading, airflow components or sealing surfaces are damaged, or when reliable replacement parts are no longer obtainable.
Start by identifying the full tank model, including its version where applicable. Product families can contain different generations with similar external appearances but incompatible glass dimensions.
Some reservoirs use a straight tube while others require a shaped component that interfaces with a particular upper or lower section. Glass height and seating diameter are essential; thread compatibility concerns the surrounding assembled parts rather than necessarily the glass tube itself.
The following comparison helps separate a worthwhile repair from a potentially unreliable one.
| Condition | Replacement glass | New tank |
|---|---|---|
| Glass damaged, metal housing intact | Usually appropriate with an exact replacement | Normally unnecessary solely because of glass damage |
| O-rings worn or missing | Appropriate if correct seals are available | Consider if compatible seals cannot be sourced |
| Threading or sealing surfaces damaged | May not restore reliable operation | Generally the safer option |
| Original bubble glass unavailable | Compatible straight glass may work | Not essential if an approved alternative exists |
| Uncertain model or replacement compatibility | Avoid unverified substitutes | Consider a complete supported replacement |
| Replacement parts unusually expensive | Compare full repair cost | May offer better long-term value |
Price is only one consideration. Include replacement seals, delivery, availability and the condition of the existing tank when comparing options. No universal price threshold determines whether a repair is worthwhile.
A compatible straight tube can be a useful intermediate solution when the original bubble version is difficult to find. However, physical resemblance is insufficient evidence of compatibility.
Also verify the construction material. The manufacturer’s Innokin Go-Z tank specifications and maintenance advice identify the Go-Z as a polycarbonate tank rather than a glass one. This illustrates why identifying the exact reservoir is necessary before ordering a replacement.
If the metal assembly is visibly distorted, repeatedly leaks despite correct parts or cannot be dismantled safely, a new compatible tank is a more defensible choice than repeated improvised repairs.
If repair remains appropriate, careful cleaning is the next essential step, particularly where fragments or old e-liquid have collected around the seals.
How Do You Clean a Vape Tank Step by Step Without Losing Small Parts?
Clean a disassembled vape tank by arranging components in removal order, separating washable parts from electrical or absorbent components and using the cleaning method approved by the manufacturer. Dry each piece thoroughly, check for missing O-rings and reassemble in reverse order. Keeping small parts organised is just as important as removing residue.
Prepare a clean, well-lit area before dismantling the tank. A small tray with compartments works well because it prevents tiny seals, gaskets and inserts from rolling away. A clean towel can serve the same purpose, provided its fibres do not trap or conceal parts.
For a tank that permits user disassembly, follow a consistent sequence:
- Record the arrangement: note the position of each O-ring and removable component, using the manufacturer’s diagram where available.
- Remove the coil as instructed: keep electrical contacts and components containing absorbent wicking material separate from parts intended for water cleaning.
- Clean approved glass and metal parts: rinse them gently with warm water if permitted, paying attention to the glass seats and threaded areas.
- Inspect the seal grooves: remove visible residue and confirm that no glass fragments remain.
- Dry and organise: allow all cleaned components to dry completely before checking the parts against the original arrangement.
- Reassemble carefully: restore the correct seals and fittings in reverse order without forcing the connections.
Warm water is commonly suitable for removable glass and certain metal components, but this does not mean every tank part can be submerged. Consult the manufacturer’s instructions before exposing an integrated airflow mechanism, non-removable electronic component or coil assembly to water.
Keep the battery connection and powered device dry. If liquid has entered electrical components, do not reconnect or operate them until the manufacturer or a qualified technician has confirmed the appropriate next steps.
Avoid strong detergents or scented cleaners that may leave residues. Do not use boiling water or cleaning chemicals simply because a deposit appears stubborn.
Never substitute an O-ring from another tank merely because it looks similar. Differences in cross-section or groove dimensions can prevent proper sealing without producing an obvious assembly defect.
Before final assembly, examine the drying towel and tray for overlooked rings. Reassembly errors often arise when a component has been cleaned successfully but not returned to its correct position.
Once the reservoir is clean and structurally sound, inspect the coil as well; its condition can affect performance even when the new glass is fitted correctly.
Key takeaways before replacing the coil
- A successful glass repair restores the reservoir’s sealing surfaces; it does not automatically restore a worn coil.
- Coil condition should be assessed separately from tank leakage, because burnt flavour and weak vapour can have several causes.
- Correct coil installation and manufacturer-approved priming are essential before returning the repaired tank to service.
When Should You Replace a Vape Coil Instead of Continuing to Use It?
Replace a vape coil when it produces a persistent burnt taste, visibly damaged wicking material or noticeably deteriorated flavour and vapour performance that cannot be explained by incorrect settings or insufficient liquid. Opening a tank to replace broken glass is a convenient opportunity to inspect the coil, but glass damage alone does not require coil replacement.
The coil contains a heating element and, in many common designs, absorbent material that carries e-liquid to the heated surface. Residue accumulation and changes in the condition of this material can gradually reduce performance.
Several symptoms deserve attention:
- Persistent burnt flavour: particularly concerning when the coil has been prepared correctly and remains supplied with sufficient liquid.
- Darkened or visibly damaged cotton: may indicate deterioration, especially alongside a burnt taste.
- Muted flavour or reduced vapour: can indicate an ageing coil, although operating settings and liquid characteristics should also be checked.
- Persistent gurgling or flooding: can involve incorrect coil seating, incompatible liquid characteristics, damaged seals or other assembly problems.
Gurgling does not automatically mean that the coil has reached the end of its life. First check whether it is fitted and sealed according to the manufacturer’s instructions. If the issue continues, replacement may be appropriate.
If broken glass or liquid potentially containing fragments has reached the coil, do not attempt to recover that contaminated liquid. Replace any coil that cannot be confirmed free of contamination.
Changing e-liquid flavour or VG/PG ratio does not universally require a fresh coil. However, an old coil can retain the previous flavour, and a substantially different liquid may behave differently in the same wicking system. Follow the coil manufacturer’s recommendations on compatible liquids and power settings.
When fitting a new coil, prime it using the instructions specific to that model. For coils designed for direct priming, this may involve applying the recommended amount of e-liquid to accessible wicking ports, fitting the coil, filling the tank and allowing time for the wick to saturate.
Manufacturer instructions differ: Innokin’s general troubleshooting advice describes a waiting period of at least 15 minutes for its specified priming procedure, while certain model-specific guidance gives at least five minutes. Neither duration should be imposed on every coil.
Begin at the lower end of the coil’s specified wattage range where recommended, then adjust only within the approved limits. This reduces the risk of operating a new coil before its wick is adequately prepared.
Complete the repair by confirming that the tank is clean, the correct glass and seals are fitted, the coil is prepared according to its instructions and no leakage is visible. If any component remains damaged or the assembly cannot be verified, leave the device switched off and obtain an appropriate replacement or professional assessment.
Can you use a vape tank with a tiny crack if it does not leak?
No. A small crack indicates that the glass is already damaged, even when the tank appears liquid-tight. Stop using the tank and fit the correct replacement glass before operating it again. The absence of visible leakage does not establish that the reservoir is structurally sound.
Can replacement vape glass from another brand fit the same tank?
Only if compatibility with the exact tank model is explicitly confirmed. Similar-looking glass may differ in height, diameter or sealing profile. An unverified substitute can create an uneven seal, leak or break during assembly. Use manufacturer-approved parts or replacements with clearly documented compatibility.
Should you keep e-liquid from a tank with shattered glass?
No. Liquid exposed to broken glass may contain fragments that are difficult to identify or remove. Do not filter it for reuse. Handle and dispose of contaminated liquid according to local guidance, keeping nicotine-containing products away from children and pets.
Why does a vape tank leak only after being refilled?
Possible causes include an incorrectly seated O-ring, a misaligned coil, a poorly fitted glass tube or overfilling. Liquid entering the central coil passage can also escape through the lower airflow area. Check the manufacturer’s filling instructions and inspect the relevant seals rather than assuming that replacement glass is defective.
Can you repair vape tank glass using glue or sealant?
Glue and household sealants are not suitable substitutes for approved replacement glass. They do not reliably restore the original mechanical strength or sealing geometry, and their compatibility with e-liquid and device operating conditions may be unknown. Replace the damaged part or the complete tank instead.