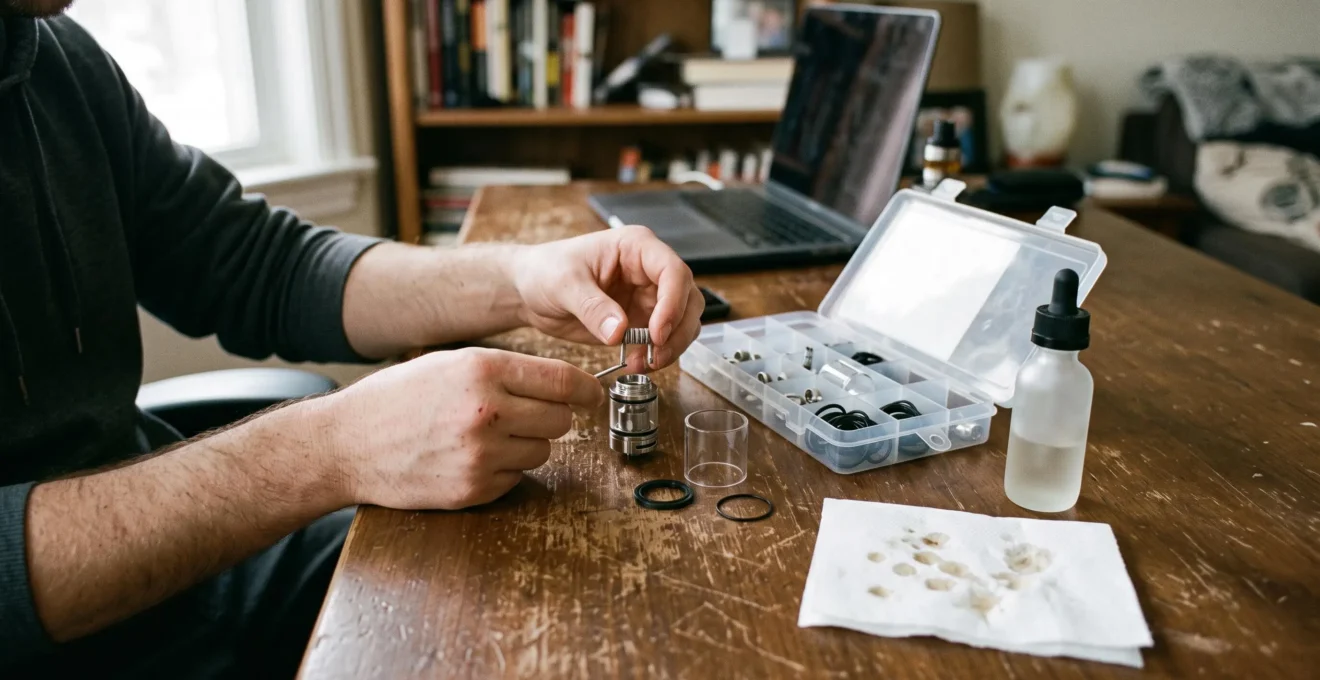
The most useful replacement vape parts to keep are compatible coils, a spare tank glass and the correct seals or O-rings. These components can wear out, become damaged or make an otherwise functional refillable tank unusable. Keeping a modest supply allows routine maintenance without replacing the entire device.
However, not every component is suitable for home replacement. A cracked glass tube is fundamentally different from a damaged battery connector or faulty electronic circuit. Understanding that distinction prevents a straightforward maintenance task from becoming a safety problem.
Compatibility matters just as much as availability. Two replacement parts may look identical while having different dimensions, electrical connections or sealing arrangements. A spare that does not fit correctly offers little practical value, even if it was inexpensive.
For adult UK vapers using refillable equipment, the sensible approach is to identify the device precisely, keep spares for predictable wear and breakages, and recognise when professional assessment or complete replacement is necessary.
Essential vape spare parts at a glance
- Keep model-compatible replacement coils, a spare glass tube and the correct O-rings where your tank supports separate replacement.
- Confirm the exact product version, physical dimensions and manufacturer-approved compatibility before buying or storing components.
- Replace an entire tank or stop using the device when structural damage, abnormal heating or electrical faults make simple maintenance unsafe.
- Why Are Some Vape Parts Designed to Be Replaced Instead of the Whole Device?
- How Do You Check Whether a Replacement Vape Part Actually Fits Your Device?
- Replacement Part or New Tank: Which Is More Sensible After Damage?
- Which Vape Damage Should Not Be Fixed With a Simple Replacement Part?
- When Should Common Vape Parts Be Replaced Before They Fail Completely?
- Straight or Bubble Vape Glass: Which Better Fits Your Daily Use?
- How Do You Replace a Vape Coil Without Causing Leaks or a Burnt Start?
- How Should You Clean a Vape Tank Without Damaging Its Parts?
Why Are Some Vape Parts Designed to Be Replaced Instead of the Whole Device?
Some refillable vape tanks are designed with replaceable components because coils deteriorate during normal use, seals can lose their effectiveness and glass tubes can break. Separating these components from the durable tank structure allows a faulty part to be replaced without discarding everything. This modular approach is useful only when the manufacturer supports individual component replacement.
The distinction becomes clearer when separating consumables from parts kept for unexpected damage.
- Replacement coils: consumable components containing heating elements and wicking material that gradually lose performance.
- O-rings and seals: components that maintain liquid-tight connections and may eventually become distorted, hardened or damaged.
- Replacement glass: a breakage spare intended to restore an otherwise undamaged tank after its glass section cracks or shatters.
- Drip tips: removable mouthpieces that may be replaceable when damaged, provided their fitting is compatible.
The Aspire Athos tank user manual demonstrates this construction. The documented tank has separately identifiable coil heads, a glass tube and seals. Its original package also included additional coil heads, a glass tube, a drip tip and O-rings.
Those package contents illustrate one manufacturer’s modular design, not a universal spare-parts requirement. Another tank may use a different assembly, while sealed pods and some all-in-one devices require an entire cartridge or proprietary component to be replaced.
A useful spare kit therefore starts with the actual device, not a selection of supposedly universal accessories. A replacement part only saves money and inconvenience when it matches equipment that is still in service.
Before buying multiples, establish which parts your tank’s manufacturer explicitly identifies as removable and replaceable. That list provides the foundation for checking compatibility.
How Do You Check Whether a Replacement Vape Part Actually Fits Your Device?
Check replacement vape part compatibility by matching the exact device model and version, confirming the manufacturer’s approved component references, and inspecting the physical fitting. Similar appearance or matching diameter alone is insufficient. A reliable spare should install without force, seal correctly and operate within the specifications supplied for the device.
A three-level compatibility check helps eliminate common mistakes.
- Exact identification: record the tank or pod model, version and any relevant production revision. Check the component reference against its packaging or official parts documentation.
- Approved product family: establish whether the replacement is listed for that specific tank or cartridge system. Different generations within one product range may use different coil connections or sealing designs.
- Physical and electrical fitting: compare glass height and diameter, O-ring placement, coil dimensions and the relevant connector design. For complete tanks, distinguish standard 510 connections from proprietary fittings.
Coils are particularly deceptive because a component may appear to fit while still having an unsuitable connection or electrical specification. Conversely, two glass tubes can have similar diameters but different heights or profiles, preventing the upper and lower seals from compressing correctly.
Do not assume that a component is compatible merely because it threads partway into place. Resistance, uneven gaps and misalignment are reasons to stop rather than tighten harder.
Five checks before adding a vape part to your spare kit
- Identify the device and tank model from their markings or documentation. Record the complete model name and version.
- Locate the original component reference in the manual or manufacturer’s parts information. Save the verified part number.
- Check the replacement’s stated compatibility and specifications. Record the approved models and any relevant dimensions.
- Inspect the part and its fitting without forcing assembly. Confirm that threads, seals and contact surfaces align correctly.
- For components intended for user replacement, follow the manufacturer’s installation and functional checks before storing or relying on the spare. Record whether the fitting and operation were satisfactory.
A replacement coil should also be checked against the supported resistance and power settings. Once properly installed and prepared, observe the device for connection errors, abnormal behaviour or leaking. Never attempt to prove electrical compatibility by bypassing protection features or manipulating damaged contacts.
Official manufacturer cross-compatibility listings are stronger evidence than unqualified descriptions such as “universal replacement glass”. Where no reliable confirmation exists, choosing an explicitly supported component is preferable to experimenting.
Even a fully compatible component cannot compensate for damage elsewhere in the tank. The condition of the surrounding hardware must also influence the repair decision.
Replacement Part or New Tank: Which Is More Sensible After Damage?
Replacing an individual component is usually sensible when damage is confined to a removable glass tube, seal or other manufacturer-supported part and the remaining tank is intact. A complete replacement tank is the safer choice when the base, threads, connector or structural assembly is damaged. Availability and total replacement cost also affect the decision.
The key question is whether the tank can still provide reliable mechanical alignment, sealing and electrical contact after the damaged component is replaced.
The following comparison provides a practical starting point.
| Condition | Replace individual part | Replace complete tank |
|---|---|---|
| Cracked removable glass | Appropriate if the frame and seals are undamaged | Necessary if compatible glass is unavailable or surrounding hardware is damaged |
| Worn or damaged O-ring | Appropriate when the sealing surfaces are intact | Consider if the tank remains defective after correct seal replacement and inspection |
| Damaged threads or distorted base | Not an appropriate simple repair | Preferred where damage affects structural integrity |
| Faulty tank connector | Do not attempt an improvised electrical repair | Replace or seek manufacturer support |
| Obsolete replacement components | Only if a genuine compatible part is obtainable | More practical when approved parts cannot be sourced |
A fine crack in a glass tube should not be ignored because the tank has not yet started leaking. Continued handling, temperature changes or an additional impact could cause the damaged section to fail. Empty the tank safely and replace the glass before further use.
Cost calculations should also include convenience. Installing compatible glass in a sound tank preserves other serviceable components, whereas a new tank may require fresh installation, filling and coil preparation.
However, saving a coil is not a reason to retain structurally damaged hardware. A coil that has been exposed to debris or cannot be removed safely should not be reused merely to reduce costs.
Parts availability introduces another consideration. Replacement components for an older tank may become difficult to obtain even while complete units remain available through some retailers. In that situation, a new tank with accessible replacement parts may offer better long-term maintainability.
If damage extends beyond the replaceable component, escalating the repair is generally more sensible than repeatedly fitting new parts to a questionable assembly.
Which Vape Damage Should Not Be Fixed With a Simple Replacement Part?
Battery swelling, unusual device heating, damaged electrical contacts, persistent electronic errors and visibly compromised internal components should not be treated as routine spare-part problems. Stop using and charging the affected device. These faults may involve electrical or battery safety risks that cannot be resolved by fitting another coil, glass tube or seal.
Routine tank maintenance is different from repairing a power source or control circuit. A refillable tank may be designed for disassembly, but that does not make the mod’s internal electronics or integrated battery user-serviceable.
Warning signs requiring a more cautious response include:
- A swollen, visibly damaged or abnormally hot battery or device.
- Repeated activation, charging or atomiser errors that remain after normal, manufacturer-approved checks.
- Corroded, bent, loose or damaged electrical contacts.
- A cracked or distorted mod casing affecting the battery compartment or electronic assembly.
- Leakage that persists after a correctly fitted replacement and a careful inspection of the tank.
Persistent leakage does not automatically prove that the tank is structurally defective. Incorrect filling, assembly, seal placement or coil installation may also be responsible. However, repeated leakage after those factors have been checked warrants further investigation rather than an endless series of replacement parts.
The FDA guidance on vape battery fire and explosion risks warns that battery incidents can cause serious injuries. Its safety advice includes following manufacturer instructions and using only batteries recommended for the device. Although issued in the United States, these battery-handling principles are relevant when assessing hardware safety.
Do not bend damaged battery contacts back into place, bridge electrical connections or dismantle an integrated battery to attempt a home repair. A device with suspected battery damage should be isolated from use and assessed through the manufacturer or a qualified service provider.
Where disposal is necessary in the UK, batteries and electronic equipment should follow appropriate electrical and battery collection arrangements rather than ordinary household waste.
Once the device itself is confirmed sound, attention can return to preventing normal consumable deterioration from causing avoidable interruptions.
When Should Common Vape Parts Be Replaced Before They Fail Completely?
Replace vape coils when flavour, vapour production or wicking performance begins to deteriorate consistently, rather than waiting for complete failure. Inspect seals and glass periodically for damage because they may fail with little warning. There is no single replacement interval suitable for every device, liquid formulation or pattern of use.
Coil wear is especially dependent on operating conditions. Frequent use, unsuitable power settings and liquids containing substantial sweeteners can affect how quickly deposits accumulate or the wick deteriorates.
Useful signs that a coil may need replacing include:
- A persistent burnt, stale or altered flavour after checking the liquid level and settings.
- Reduced vapour production despite normal battery charge and appropriate operating conditions.
- Visible darkening or deposits around accessible wicking material.
- Changes in draw resistance that cannot be explained by airflow settings or a blocked mouthpiece.
These symptoms are diagnostic clues rather than proof of coil failure. For example, low vapour production may also result from poor electrical contact or inappropriate settings.
Innokin‘s official troubleshooting instructions describe several possible causes of leaking, burnt flavour, connection faults and reduced vapour. This reinforces the importance of checking the entire assembly before replacing a component.
A preventive replacement approach makes sense when degradation is clear and the coil is already approaching the end of its useful performance. Waiting until the taste becomes severely burnt can make routine maintenance unnecessarily unpleasant.
Seals and glass need a different strategy. A seal may gradually lose elasticity, while a very fine glass crack may be noticed only during disassembly. Check both when the tank is opened for normal servicing, particularly after an impact.
Storage conditions matter as well. Keep unused coils in their original packaging, away from moisture, contamination and excessive heat. Protect replacement glass from impact, and avoid compressing or stretching loose O-rings unnecessarily. Manufacturer storage recommendations should take precedence where available.
There is little benefit in accumulating a large inventory for equipment that may be retired or replaced. A small, regularly checked selection of compatible spares is more practical than storing numerous unidentified components.
For glass replacements, however, the decision is not just about timing. Choosing the appropriate shape can influence how practical the tank is to carry and refill.
Straight or Bubble Vape Glass: Which Better Fits Your Daily Use?
Straight vape glass is generally more practical when a compact, less exposed tank profile matters, while bubble glass may offer greater capacity on compatible tank designs. Neither shape is automatically safer or more durable. The best choice depends on the manufacturer’s supported options, the tank’s dimensions, and how the device is carried and used.
Straight glass maintains a relatively uniform profile between the tank’s upper and lower sections. This can reduce the extent to which the glass projects beyond neighbouring hardware, making it convenient for devices regularly carried in pockets or bags.
Bubble glass curves outward to provide additional internal space. On designs that support it, this may reduce the frequency of refilling, although the wider glass can become the most exposed part of the assembled tank.
| Consideration | Straight glass | Bubble glass |
|---|---|---|
| External profile | More compact and uniform | Projects further outward |
| Liquid capacity | Determined by the tank design | May provide additional capacity |
| Carrying convenience | Often easier to accommodate in confined spaces | May require more clearance and protection |
| Impact resistance | Depends on thickness, material and impact | Also depends on thickness, material and impact |
| Compatibility | Requires the correct model-specific dimensions | Requires an explicitly compatible tank design |
Claims that bubble glass is inherently stronger because of its curved shape should be treated cautiously. Actual breakage resistance depends on glass quality, thickness, manufacturing characteristics and the location of an impact. Shape alone is insufficient to establish superiority.
For UK users, the tank’s intended market and applicable capacity restrictions also matter. In Great Britain, nicotine-containing e-cigarette tanks placed on the consumer market are subject to a 2 ml capacity limit under the tobacco and related products framework. A larger-capacity accessory should not automatically be assumed suitable or lawful for every UK market or product configuration; Northern Ireland has a distinct regulatory context.
Filling technique remains important with either format. Do not exceed the manufacturer’s filling instructions or allow e-liquid to enter the central airflow chimney. Greater available volume does not justify overfilling.
Most importantly, a straight and bubble glass option must be explicitly supported by the tank. Matching the apparent diameter without checking the full design can produce gaps, leakage or mechanical stress.
Once the tank glass is secure and correctly fitted, coil replacement becomes the next common maintenance task where careful handling prevents avoidable problems.
How Do You Replace a Vape Coil Without Causing Leaks or a Burnt Start?
Replace a vape coil by switching the device off, following the tank’s disassembly instructions, removing the worn coil and installing an approved replacement. Prime the new wick as directed, refill without flooding the central airflow passage, and allow sufficient saturation time before use. Begin at the lower end of the coil’s recommended power range where applicable.
Coil replacement methods vary between threaded coil heads, press-fit assemblies and proprietary cartridges. Some tanks must be emptied before the coil can be removed. Others allow a controlled replacement while a limited amount of liquid remains inside.
Follow the instructions for the exact tank rather than assuming a generic technique will work.
- Switch off the device and remove the tank where the manufacturer recommends doing so.
- Empty the tank if necessary, or position it as instructed to prevent liquid escaping during disassembly.
- Remove the old coil carefully, checking that its seals have not remained attached inside the tank base.
- Inspect the glass, surrounding threads and O-rings for damage or contamination.
- Install the correctly specified replacement coil without overtightening or forcing its fitting.
- Prime the exposed wicking material where instructed, refill through the designated opening and allow the wick to saturate for the manufacturer’s stated period.
- Reassemble, check for leakage and begin at an appropriate low setting within the coil’s recommended operating range before increasing gradually if needed.
Insufficient saturation can allow the heating element to operate against inadequately wetted material, causing a burnt taste from the first use. Excessive initial power can worsen the problem even when the coil is otherwise compatible.
Manufacturer priming instructions are not interchangeable. The Aspire Athos documentation specifies a five-minute wait after filling, while Innokin’s general troubleshooting guidance recommends at least fifteen minutes in its relevant procedure. The correct interval depends on the particular component and instructions, not a single universal rule.
Leakage following replacement may involve an incorrectly seated coil, a displaced seal, damaged tank hardware or liquid entering the airflow channel. Priming and suitable filling procedures help, but not every leak indicates that the new wick was insufficiently saturated.
If the tank leaks or the device reports an unexpected atomiser error, stop and inspect the assembly instead of repeatedly activating it. A new coil should not be used to work around an unresolved mechanical or electrical fault.
Because changing a coil already involves opening the tank, it is also a convenient opportunity to clean reusable components before reassembly.
Key takeaways before cleaning your tank
- Keep electrical components and integrated batteries completely separate from any water-based cleaning process.
- Distinguish reusable glass and metal components from worn coils, wicks and seals that require replacement.
- Use the tank manufacturer’s cleaning instructions, particularly when plastic parts, coatings or specialised seals are present.
How Should You Clean a Vape Tank Without Damaging Its Parts?
Clean a refillable vape tank by disassembling only its manufacturer-approved removable parts, rinsing suitable glass and metal components with water at the recommended temperature, and allowing everything to dry completely before reassembly. Keep electronic components and coils that are not designed for washing out of the water. Avoid harsh chemicals, excessive heat and abrasive cleaning methods.
Routine cleaning is particularly useful when replacing a worn coil or changing to a substantially different e-liquid flavour. These occasions allow the tank to be inspected while it is already open, without introducing unnecessary disassembly.
A practical cleaning sequence is straightforward:
- Switch off the device, remove the tank if appropriate and empty any remaining e-liquid safely.
- Disassemble the removable glass and other washable components according to the user manual.
- Set the used coil aside rather than attempting to restore a worn factory-made coil by washing it.
- Rinse manufacturer-approved components with suitable water, paying attention to accessible liquid residue.
- Allow all washed components to air-dry thoroughly and inspect the seals before reassembly.
- Install a serviceable or new coil as directed, reassemble the tank and check that the seals sit correctly.
For light residue, a simple water rinse may be sufficient. More stubborn deposits can require additional attention, but cleaning solutions should only be used when compatible with the tank’s materials and manufacturer guidance. Do not assume that bicarbonate, detergents, alcohol or other solvents are safe for every tank.
Innokin’s atomizer cleaning instructions describe removing the atomiser components, rinsing the washable parts while excluding the coil, air-drying them and reassembling the unit. The guidance also identifies coil changes and substantial flavour changes as suitable times for cleaning.
Although those instructions describe hot water for applicable components, that does not establish that boiling water is safe for all tanks. High temperatures can affect certain plastics or seals. Use a temperature appropriate to the specific materials rather than applying intense heat indiscriminately.
Avoid immersing the mod, charging electronics or an integrated battery compartment. Even where a tank contains some metal components, its connection surfaces should be inspected and completely dry before reattachment to the power unit.
Cleaning also provides an opportunity to decide which components remain reusable. Intact glass and compatible metal hardware can usually continue in service, while cracked glass, distorted seals and worn coil assemblies should be replaced as appropriate.
Do not attempt to restore the elasticity of a damaged O-ring through cleaning. A seal that has hardened, torn or changed shape may no longer provide reliable compression, regardless of how clean it becomes.
At the next routine service, identify your exact tank model, check the manufacturer’s supported parts list and inspect the components already fitted. Keep only the compatible spares your equipment can genuinely use, and retire any component whose condition cannot be trusted.
How many spare vape coils should you keep?
There is no universal quantity. A modest supply matched to your normal replacement frequency and access to compatible parts is generally more practical than a large stockpile. Keep coils in their original packaging and review the inventory if you change tanks or devices.
Can replacement vape glass from another brand be used?
Only when compatibility is explicitly established for the exact tank and glass specification. Brand differences alone do not determine compatibility, but matching diameter is insufficient: height, shape, sealing surfaces and assembly tolerances also matter.
Should spare vape coils be stored with e-liquid already applied?
Unused replacement coils are generally best kept unopened and dry in their original packaging until installation. Priming is normally carried out shortly before fitting and using a new coil, following its manufacturer’s instructions. Avoid preparing coils long in advance without explicit product guidance.
Can a vape tank still be used after a small amount of glass has chipped?
Chipped or cracked glass should be replaced rather than continuing to use the tank. Damage may weaken the glass, compromise the seal or leave fragments in the assembly. Inspect neighbouring parts for damage and use only a compatible replacement.
Is it worth keeping spare components for an older vape tank?
Keeping a limited supply may be useful if the tank remains mechanically sound and the parts are genuine or manufacturer-approved compatible replacements. If components have become difficult to verify or obtain, replacing the tank with a maintainable model may be more practical than purchasing uncertain aftermarket parts.